Tuesday, March 23, 2010

Piccolini with Mushroom & Tomato Ragu

The Recipe:

1 carrot, grated
1 onion, minced
1 stalk of celery, grated
1 pound mushrooms, sliced
1 28 oz can whole tomatoes
1 14.5 oz can diced tomatoes
1/4 cup red wine
3 tbsp Olive Oil
1 tbsp sugar
1/2 lb Piccolini Pasta(Mini Farfalle)
1/2 cup grated cheese (e.g. Parmigiano-Reggiano or Pecorino)

Spices:
Garlic Powder, Oregano, Rosemary, Thyme, Nutmeg, Salt, Black Pepper
(See "Notes" below for more information on spices.)

Heat onion, celery & carrot in the olive oil over medium-high heat. Cook about 5 mins and then add mushrooms. Season with salt, pepper and about 1/2 of the spices. Cook about 10 more mins or until veggies are translucent and soft.

Pour in wine and deglaze pan allowing alcohol to evaporate.

Add tomatoes, sugar and remaining spices. Mix well, bring to light boil and reduce to simmer, cooking for an additional hour, stirring occasionally.

Cook pasta, drain and add to pan, mix well and stir in cheese. Enjoy!

Notes:

- For spices, 1/2 tbsp of Oregano, 1 tsp Rosemary,
   1 tsp Thyme and a good pinch of crushed red pepper & nutmeg were used.
   Fresh garlic can be used instead of 1 tbsp of garlic powder.
   Season according to your taste.

- I purposely chop some of the mushrooms with my wooden spoon when cooking. It's helps make it more of a "Ragu".

- The remaining stubs after grating the carrot and celery were chopped and thrown into the frying pan. You can chop additional amounts and add if desired.

- The celery had nice leaves so they were chopped and also used.

- The sugar helps to cut some of the acid from the tomatoes and adds a little sweetness.

- Use whatever wine you enjoy drinking or have open. White will work just as well or omit it all together. Vegetable broth can be used instead. It's all about the flavor.

- I've made this omitting the onion for onion-allergic guests. And it came out just fine!

- Farfalle/Piccolini is the same as "Bow-Tie" Pasta.

Tuesday, September 08, 2009

Sloppy Joe and Cornbread Bake


The inspiration for this receipe came mainly from two things. The first being I've been on the hunt for quick & great tasting recipes and came across Sloppy Joes in my cookbook du jour; The Best 30-Minute Recipes by the Editors of Cook's Illustrated.

Secondly, incorporating cornbread, which I both love and was stolen from another recipe, Skillet Tamale Pie which was on the page before. After I read the Skillet Tamale recipe, I knew it wasn't for me but I liked that it was topped and baked with cornbread. And so the journey begins...

The Sloppy Joe's: I use the recipe from America's Test Kitchan as a base but modified it by using ground turkey. I also added more of slightly heaping 1/2 teaspoon of chili powder, because I wasn't adding in the Tabasco. Additionally I added a tad more garlic & brown sugar. Just make sure the sloppy joes aren't too dry as you'll want some good moisture to go with the cornbread.

The Cornbread: I've made tons of cornbread from scratch and quite frankly, I still find myself going back to the Jiffy Corn Muffin Mix. It's cheap, fast and I love the flavor as it's a sweeter mix and goes well with the robust sloppy joe's.

The recipe is simple.

1) Make your favorite sloppy joes.
2) Put the hot sloppy joe mixture into a 9x9 baking pan
3) Make your favorite cornbread mix.
(A box of Jiffy Cornbread Mix works well).
4) Bake according to cornbread directions
(usually takes a little less time so watch it carefully)
5) Enjoy!


It turned out AWESOME! We liked it so much I'm going to make it in bulk and freeze some 2-portion containers for weeknight meals.

Sunday, July 02, 2006

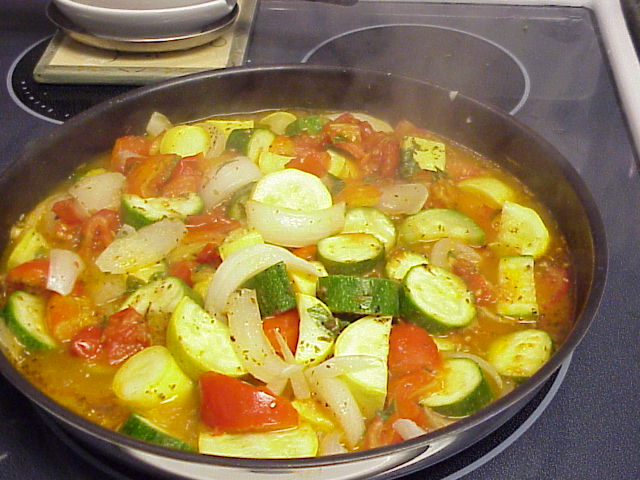
Keto Spitzad - Zucchini, Onions, Tomatoes & Yellow Squash - Keto Friendly

This is one of those great summer dishes that I would like to share. My mother made this dish a lot in the summer while growing up and it's one of the few vegtables dishes that Mark actually loves. I'm not really sure how it's spelled, so I spelled it like it's sounds.

It's great to make when the bounty of tomatoes, zucchini and squashes are at their peak. It's definitly versatile allowing for many variations. It's an excellent side dish. It goes great over rice and with pasta.

Get the frying pan going over med-high heat. Add 2-4 tablespoons of your favorite oil. Start with the onions, then zucchini/squash and finally the tomatoes. As you cut them, put them directly into the hot frying pan and let them start cooking in the oil. After vegetables are done, chop up herbs to your liking and add to vegetables reserving some for the end. Add salt and pepper to your taste cover and stir every 15 minutes or so. Keep it covered, allowing some steam to escape, but let it retain some of it's juices, especially when serving it over rice. After about 40 minutes or until veggies are cooked, remove from heat and sprinkle with cheese reserving about tablespoons. Mix gently and top off with reserve cheese. The basic recipe consists of:

1 med Zucchini sliced into 1" pieces
1 med Yellow Squash
- sliced into 1" pieces
1 med-large onion cut in 1/2
- cut into 1/2" verticle slices
3 cups of tomatoes
- quartered
4 tbsp Fresh Basil chopped
3 tbsp Fresh Italian Parsley chopped
1 tbsp italian seasoning (dried)
1 cup of grated cheese, parm. reggiano, locatelli, etc all work well.

Use any combination of herbs you want. I found that the dried Italian Seasoning works well when used with fresh herbs.

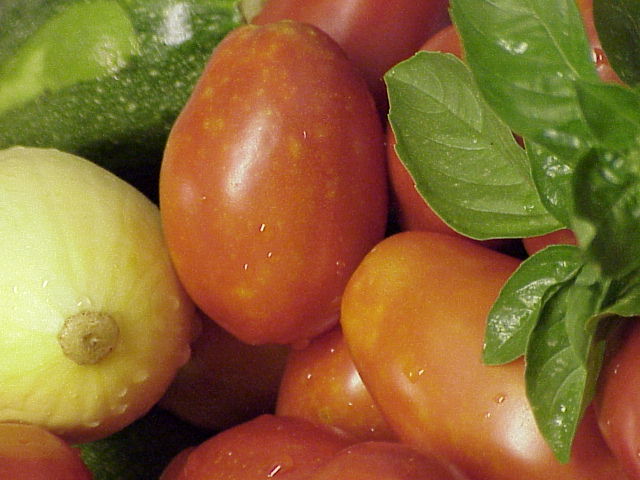
The day I made this, I used 2 green squash (in picture above) and 2 yellow squash, one very large "sweet" onion and about 3/12/ cups of tomatoes. It also refrigerates very well and never tried freezing it. For it's simplicity, you gain something that is very healthy and tasteful. I like to serve it with a my egg & cheese pasta, but that's for another time.

Tuesday, May 30, 2006

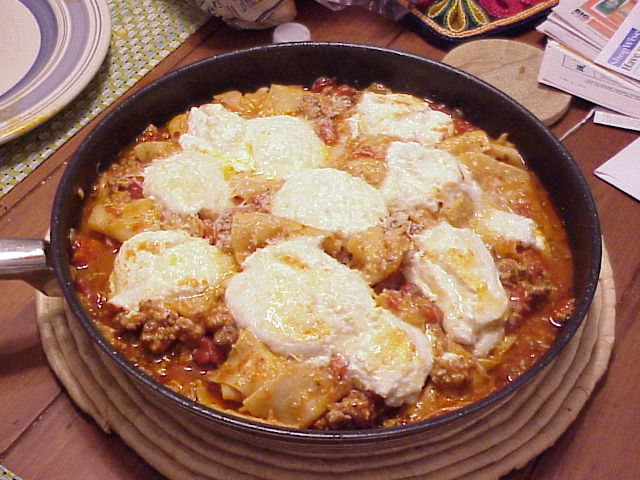
Skillet Lasagna

On a recent episode of America's Test Kitchen, they demonstrated an effective method of making Lasagna on the stove in one pan, hence, skillet Lasagna. After watching the episode (and specifically this segment) a second time, I was off to the store to gather up the ingredients. Even though I love lasagna, it can be quite the time consuming process to put together! (Nothing still beats a lasagna layered with homemade pasta sheets!) I used the Barilla lasagna sheets but they used regular lasagna noodles in the show.
I think Mark will agree with me, this dish came out absolutley delicious! It made so much that I was even able to freeze some for a future meals! The recipe is available on the America's Test Kitchen website. If you are looking for a fairly quick way to make a very tasty lasagna, I highly recommend this recipe! Finire di mangiare! (Eat Up!)

Saturday, May 13, 2006

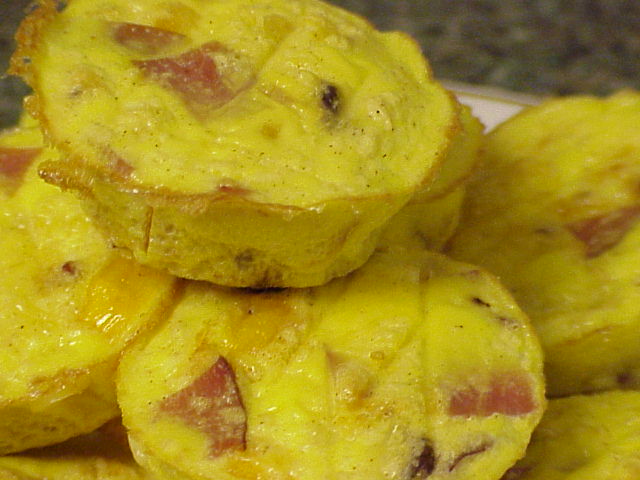
Tony Makes Kalyn's Egg "Muffins"

I've been intrigued by this recipe for quite some time. There was some Canadian Bacon that had to be used up so I thought it would be a great time to make: Kalyn's Egg "Muffins".

When shopping one day, I happened to find silicon cupcake pans that were actually on sale. There was no issue of them being released from baking. Kalyn had mentioned in a later post about theese muffins that she wouldn't make them in any other type pan.

I mixed in a chopped scallion and chopped candian bacon and some grated cheddar and Asiago cheeses along with salt and pepper and they came out Eggalicious!!!! And it's great for a Low-Carb Diet! :-) Thanks Kalyn!!

Sunday, April 16, 2006

Hot Cross Buns

I saw these in the supermarket yesterday while grocery shopping and just had to buy them as they reminded me of my childhood and I thought they'd be a nice treat this weekend. These have the taste I remember but someone must have found some of those green fruits they use in Fruitcake at Christmas time and thought that they would be good mix in with these. (They're not, they ruined it and I picked them out).

When researching the significance of this pastry which always appeared around this time of year when I was a child, the book of Dates and Meanings of Religious & Other Festivals, hot cross buns:
"used to be kept specially for Good Friday with the symbolism of the cross, although it is thought that they originated in pagan times with the bun representing the moon and its four quarters."
Helfer Pastries online states:

Hot Cross Buns are made with sweet, yeast-raised dough, raisins, currants, cinnamon and other spices. They are finished with roll icing in the shape of a cross, to remind us of the death of Jesus and the victory of His Resurrection!
Hot Cross Buns are mainly associated with Good Friday than Easter Sunday.

Bella Online had the following to say about their pagan origins:

Their origins lie in pagan traditions of ancient cultures, with the cross representing the four quarters of the moon. During early missionary efforts, the Christian church adopted the buns and re-interpreted the icing cross. In 1361, a monk named Father Thomas Rockcliffe began a tradition of giving Hot Cross Buns to the poor of St Albans on Good Friday.
In years that followed, many customs, traditions, superstitions, and claims of healing and protection from evil and were associated with the buns. In the 16th century, Roman Catholicism was banned in England, but the popularity of Hot Cross buns continued. Queen Elizabeth I passed a law banning the consumption of Hot Cross Buns except during festivals such as Easter, Christmas and funerals.


HAPPY EASTER!

Saturday, March 18, 2006

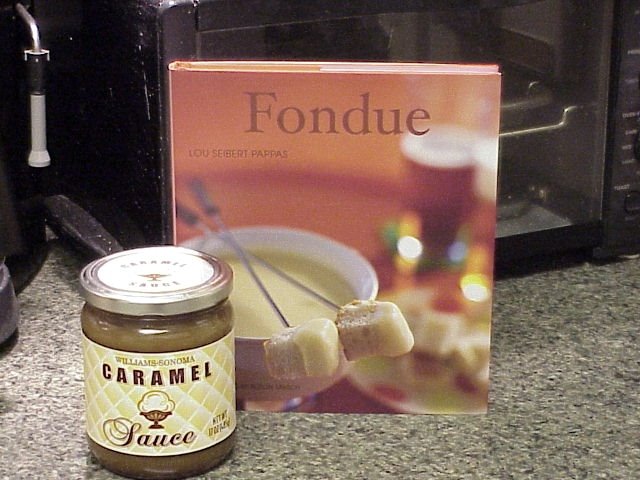
Fondue

A Recent Book Purchase ...


... and the Carmel Sauce from Williams-Sonoma was excellent on Valentine's Day when warmed and served with sliced apple and pound cake!

Sunday, February 12, 2006

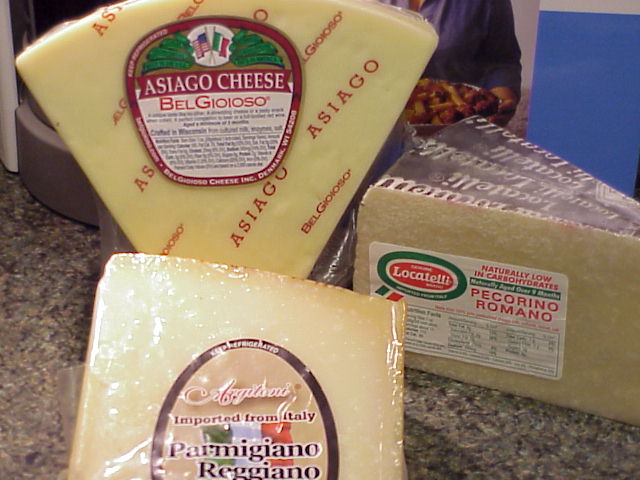
Cheese Me!

My staple of cheeses that I like to keep on hand!

Wednesday, February 08, 2006

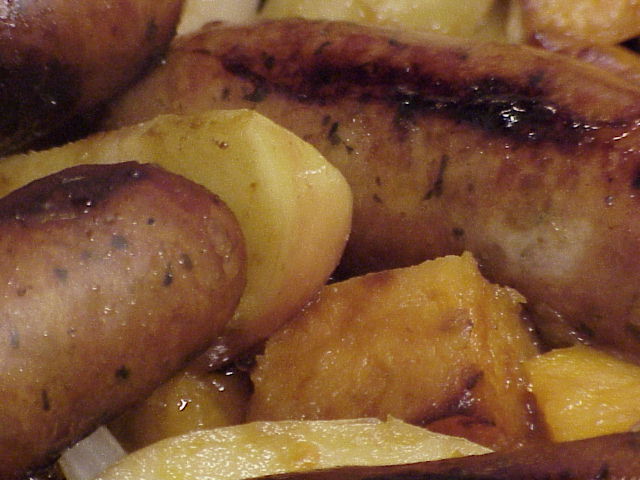
A Favorite Winter Dinner

Sweet Potatoes, Apples & Onions with Chicken-Apple Sausage

This was so good, I thought I'd share! I whipped this up pretty quick tonight while I was on the phone with Dee. (Love and Miss you!)

I also made an awesome variation of the classic mac 'n cheese, which I will also share!


More To Come . . .

Sunday, December 04, 2005

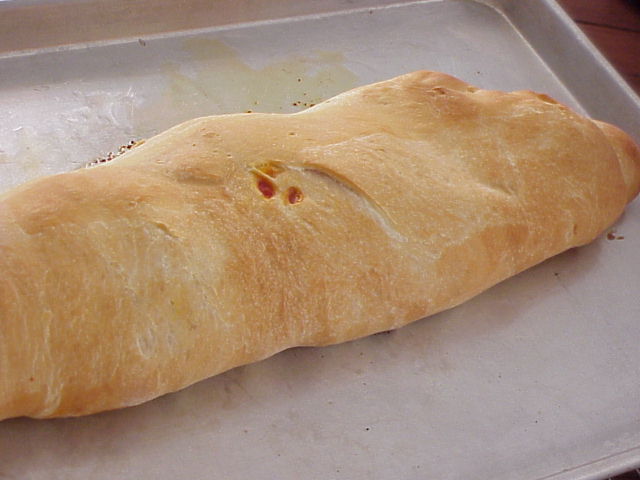
Sunday Stromboli

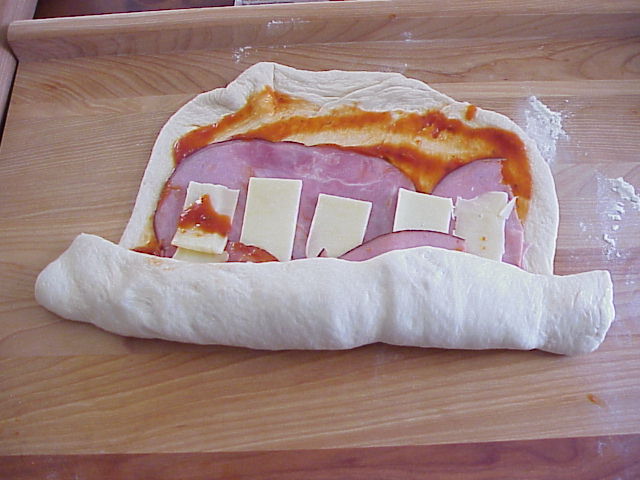
When I think of some of the delicious homemade food from when I young, Stromboli definitely ranks high on that list. Traditionally, Stromboli is made with thin slice pepperoni strips and mozzarella cheese. This Sunday the theme is Black Forest Ham and Monterey Jack Cheese.

The weather here in Tampa this first weekend in December was absolutely beautiful with 75+ degree sunny days and with working 45+ hours a week, finding quality shortcuts in the kitchen is what I strive very hard to do. I have to confess that I did purchase frozen bread dough which I have found to be a very viable replacement for the homemade version and works wonderfully for stromboli's!

After a good refrigerator thaw and a good rise, I flour the board and give the dough a good stretching. I even use a rolling pin make it even. I then begin with a thin layer of marinara, then ham and finally the cheese. I leave a margin of empty dough opposite from the side I start rolling. After it's rolled, I pinch the seams closed and seal up the ends. It's then placed seamed side down seam side down on a greased backing pan. Be sure put a few steam vents slits on the top. It's then baked for about 25-30 minutes in a well pre-heated 375 degree oven until golden brown. Don't be upset if it leaks a little. I find that that it adds to the character and taste of the stromboli.

The variations you can use for the ingredients are as many as the your imagination and taste buds can conjure.

Saturday, November 05, 2005

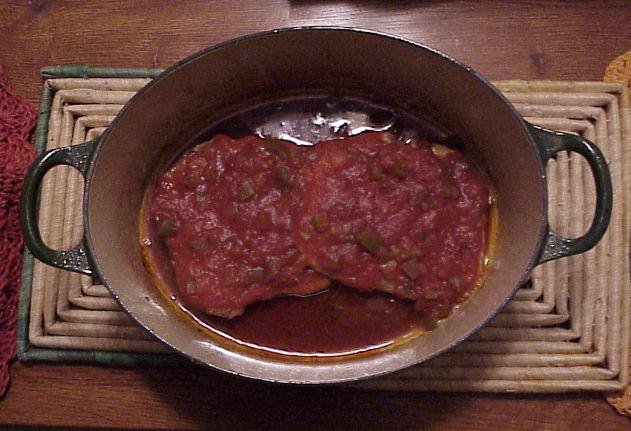
Smothered Pork Chops - Picante Style Keto Friendly

After buying some very nice butterflied boneless pork chops, to just season and throw them into the oven just wasn't going to happen. So I opened the refrigerator, started pulling stuff out and the following was the end result. This dish was so good, it has become a favorite at the dinner table. And personally, I think it's very easy to make as it cooks and cleans up beautifully in my Le Creuset.

The sauce that is left on the bottom is so delicious that I will freeze it or use it for something else. I had made roasted chicken the next night and we used it to pour over the rice.

I was going to take the pork out of the pot to plate them and snap some pictures. However, I decided to just snap the picture as they were. This shows you exactly what they looked like when I took them off the stove. I usually serve this with plain white rice and a vegetable. It would also work well with potatoes.

Some Notes on the Recipe:

Pork - If I need to sear one at a time, I reserve them on a plate to trap any of the flavorful juices that escape. Boneless chicken breast work well too.

Oil - I use a blend of Olive/Canola oil.

Wine - You can certainly use red wine in a pinch. The white I use is generally on the dryer side and don't hesitate to use less if desired. You can certainly substitute chicken or beef stock.

Salsa - I like using Pace Picante Sauce because it is nice and chunky. Picante means hot in Spanish but we use the mild version. I also like using Cha chi's Mango Salsa. Using a "sweeter" salsa/picante sauce is a preferential taste, which I think adds another layer of flavor to this dish. You can substitute sugar for the Splenda.

Here's the recipe:

Smothered Pork Chops - Picante Style
Servings: 2

2 Boneless Pork chops
2 Tbsp Cooking oil, more if needed
2/3 Cup White Wine
1 1/2 Cups Pace Picante
2 Packs of Splenda

Place salsa in small mixing bowl, add splenda. Mix well and set aside.
Heat oil over medium-high heat. Quickly sear/brown pork chops on both sides, one at a time if necessary. Remove from pot.

Being very careful as this will splatter, slowly pour wine into the pot and deglaze. Allow alcohol to evaporate. Place pork chops back into pot including any juices that escaped. They may overlap if needed.

Spoon all the salsa/picante sauce over chops. Reduce heat to a gentle simmer and cover loosley. Cook 20 minutes, less if pork is thinner, longer if thicker.

Serve Immediately.

Thursday, October 27, 2005

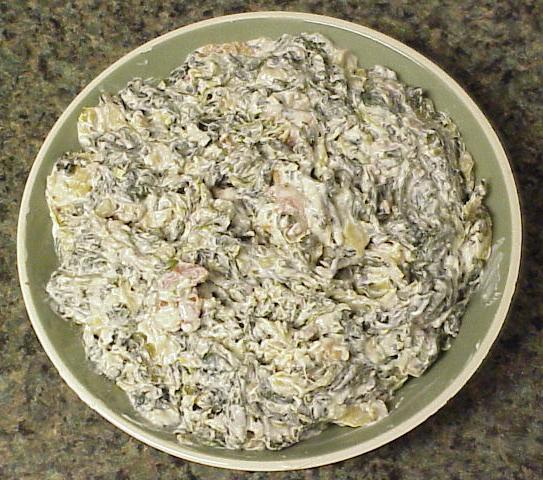
Spinach Dip... With A Different Twist

Party Line with Dan & Steve quickly became a new favorite show to catch on The Food Network. On a recent show entitled: DVD Night - episode DS101, they made a wonderful Spinach, Artichoke and Bacon Dip.

We were invited to play cards that upcoming weekend and I thought what a perfect excuse, like I needed one, to give this a try. Personally, I loved it. Because it contains artichoke hearts, I think some people shyed away from it. But the lemon zest does give it a nice fresh flavor. However, next time I think I will use a little less as it can be so strong.

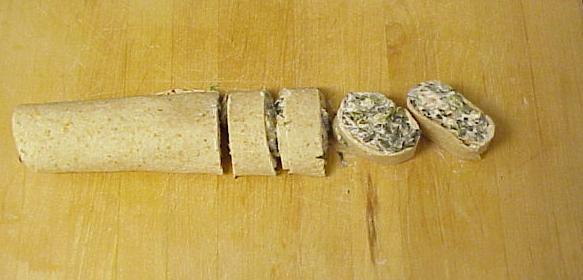
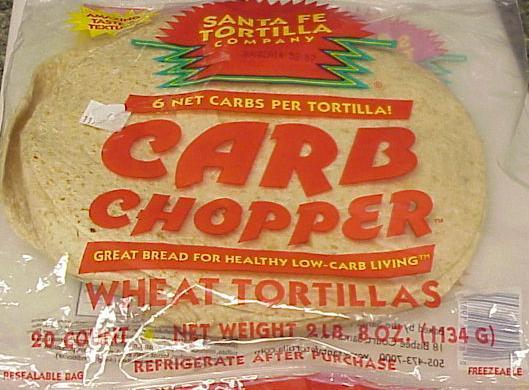
I doubled the recipe as I wanted some left over since it is very low-carb! Although it pairs very well with a good dipping chip, cracker and even torn bread, I wanted to keep within the low-carb range and took one of my carb chopper tortillia's and made it into a wrap. I like to cut them into slices, as shown in the picture on the right. It makes them easier to eat and it also makes a great appeitzer for guests.

And like any good dip, it thought it got better after 2 days in the refrigerator.

There recipe follows, and here is the link which also contains a recipe for crispy pitas, which for some reason they didn't do in the show. I guess they ran out of time. Enjoy!

Spinach, Artichoke and Bacon Dip
from Party Line with Dan & Steve

1 tablespoon vegetable oil
1 shallot, minced
3 garlic cloves, minced
1 (10-ounce) package frozen chopped spinach, thawed
1 (6-ounce) jar marinated artichoke hearts, roughly chopped
10 bacon strips, fried until crisp and crumbled
1 teaspoon lemon zest
2 cups sour cream
1 teaspoon kosher salt
1 teaspoon freshly ground black pepper
Crispy Pitas, recipe follows
Heat the vegetable oil in a small skillet over medium low heat. Add the garlic and shallot and cook, stirring frequently, until the shallot softens and the garlic begins to brown, about 7 minutes. Remove from heat and set aside.

Put the spinach in a colander and squeeze out all of the excess water. Transfer to a large mixing bowl and add the artichoke hearts, crumbled bacon, cooked garlic and shallot, lemon zest, sour cream, salt and pepper. Mix well with a rubber spatula, and transfer to a decorative bowl. Allow to sit for 30 minutes before serving so the flavors can blend. Serve with crispy pitas.

Sunday, October 23, 2005

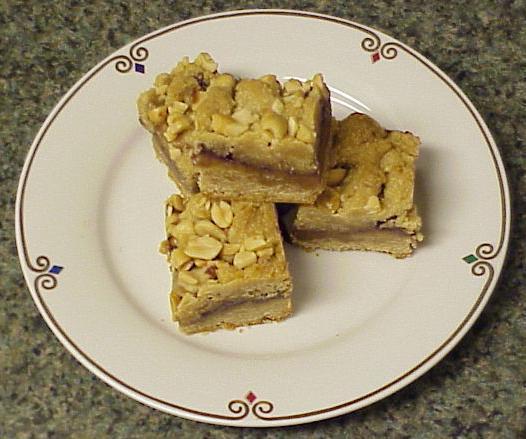
Peanut Butter & Jelly Bars

If you like peanut butter and jelly then you will probably love these. I made these last weekend and they were so delicious. The recipe comes from Ina Garten, The Barefoot Contessa on the Food Network, another one of my TIVO favorites. My only advice is not to be tempted to cut them early as they will totally fall apart. (Take it from experience). I let them cool about 3 hours and then I put them in refrigerator. They condense the longer you let them sit and cool. Oh, and I use 1 1/3 cups of sugar. You can probably get away with using even less or substituting some splenda. Enjoy!

Click Here for the link to the recipe:

1/2 pound (2 sticks) unsalted butter, at room temperature
1 1/2 cups sugar
1 teaspoon pure vanilla extract
2 extra-large eggs, at room temperature
2 cups (18 ounces) creamy peanut butter (recommended: Skippy)
3 cups all-purpose flour
1 teaspoon baking powder
1 1/2 teaspoons kosher salt
1 1/2 cups (18 ounces) raspberry jam or other jam
2/3 cups salted peanuts, coarsely chopped

Preheat the oven to 350 degrees F.

Grease a 9 by 13 by 2-inch cake pan. Line it with parchment paper, then grease and flour the pan.

In the bowl of an electric mixer fitted with the paddle attachment, cream the butter and sugar on medium speed until light yellow, about 2 minutes. With the mixer on low speed, add the vanilla, eggs, and peanut butter and mix until all ingredients are combined.

In a small bowl, sift together the flour, baking powder, and salt. With the mixer on low speed, slowly add the flour mixture to the peanut butter mixture. Mix just until combined.

Spread 2/3 of the dough into the prepared cake pan and spread over the bottom with a knife or offset spatula. Spread the jam evenly over the dough. Drop small globs of the remaining dough evenly over the jam. Don't worry if all the jam isn't covered; it will spread in the oven. Sprinkle with chopped peanuts and bake for 45 minutes, until golden brown. Cool and cut into squares.

Yield: 24 bars.

Tuesday, October 11, 2005

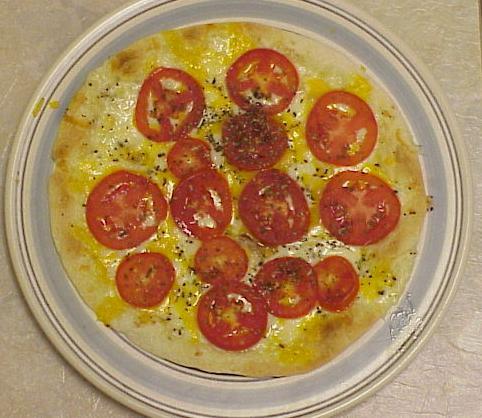
Mini Low-Carb Pizza

I thought I would share this recipe that uses low-carb wraps as your pizza dough. It's great with a salad or even as a snack. There are several pictures at the end of this entry.

Notes on the recipe:

Once you start prepping, it's very easy to make a few of these at a time, I just use the regular oven instead of the toaster oven.

Chopped fresh Basil and other fresh herbs work well if available.

Rule of Thumb For This Recipe: Any ingredient that contains a lot of moisture will soak into the wrap causing it to become very soggy and limp.

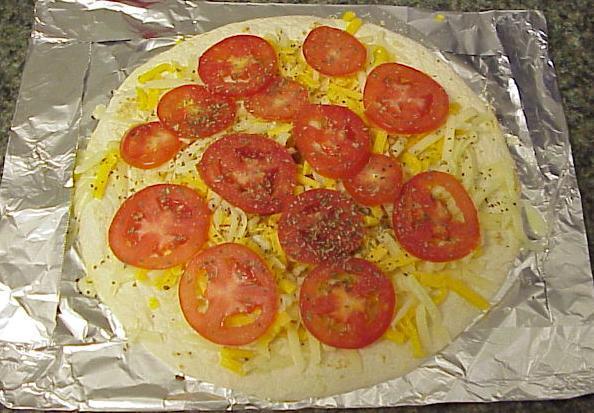
The picture shown above was made with cheddar and monterey jack cheeses.


Mini Low-Carb Pizza

1 Low-Carb Tortilla
1/4 cup of grated cheese, mozzarella, cheddar and monterey jack work best.
1 plum/roma tomato sliced (Roasted Peppers work well too)

First, bake/broil the tortilla wrap on a piece of aluminum foil as to remove a fair amount of the moisture until it starts to turn lightly brown. The ends will begin to curl up. My method is 5 mins. on one side and then I flip it and 5 mins. on the second side. If you skip this step, the pizza will turn out very soft and limp.

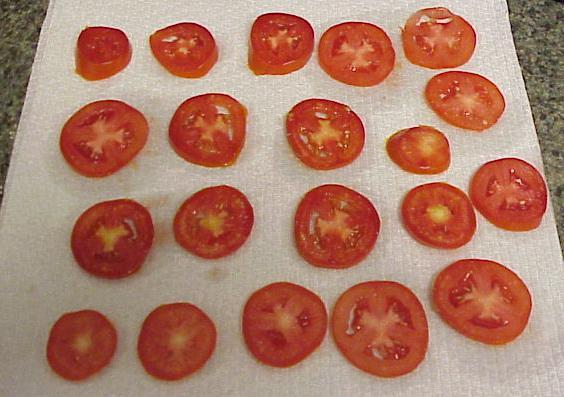
While the wrap is baking, I slice the tomato, lay them out on paper towel and sprinkle them lightly with kosher salt to draw out excess water. This will prevent the pizza from becoming soggy.

Next, if I grate the cheese(s) if necessary. Buying pre-shredded cheese saves time but it's not as fresh.

When the wrap is finished baking, remove it from the oven and I spread the cheese on top and then the tomato slices, sprinkle it with any of the following: oregano, italian seasoning, garlic powder or fresh herbs. It then gets put it back in the oven for about 3-5 mins until the cheese is melted and the ends of the wrap start to turn golden brown.

Remove from oven, let stand 1 minute and enjoy! I usually get the pizza cutter out and cut it into 8 slices.

**PICTURES**
Sliced Roma Tomatoes Tomatoes sliced, salted and on two paper towels. After they've sat for a few minutes, I take a third paper towel and press down on them from the top. It's amazing how much water tomatoes contain. I tend to use plum or roma tomatoes as they contain less water and are meatier. I leave them on top when I put them on the pizza as it lets the water evaporate instead of being trapped under the cheese.


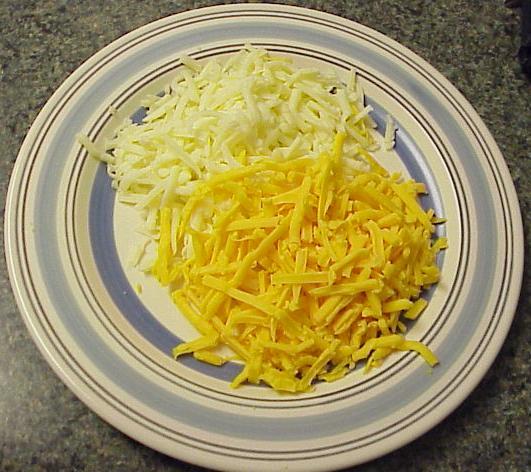
Monteray Jack and Chedder cheese freshly grated and ready to go! It's amazing how expensive cheese can be. I usually try and buy it whole and grate it myself. You just can't compare to it being freshly grated. I generally use a combination of either these two and/or mozzerella. I've even used regular American, Swiss, Asiago or Fontina. I've even grated parmesian reggiano or locatelli when I have them.


In these next two pictures, the one on the left is before it was cooked and the one on the right, obviously is after.


These are my favorite wraps. I found this 20 count package at Sam's Club. The price was $4.26. Such a deal as they are a regular part of my diet.


Friday, October 07, 2005

A Magazine Favorite: Cook's Illustrated

The companion magazine to the televison show, America's Test Kitchen, is published bi-monthly and I always look forward to every issue. It's one of those magazines that I take the time to actually sit down to read AND enjoy.

First and foremost... there are NO advertisements!! Can't say enough about that! Ok.. one more time... NO ADVERTISEMENTS!

Christpher Kimball's editorial usually brings a warm smile to my face as he shares the current happenings of the season.

The next couple of pages are filled with Notes From Readers and Quick Tips. Can I tell you how much I learn from these pages? Ok I will... the facts, tips, advice, experiences that are published are practical ideas that one can incorporate into every day kitchen life.

The remaing pages are filled with recipes, recipe make-overs, improvements and tests, equipment testing results, step-by-step instructions as well techniques and "Cook's extra" which allows you to key in codes that are valid for a certain period of time. An expiration date is listed.

A smile always appears on my face when it arrives in the mail. I know it's going to bring me together with a delicious cup of coffee or tea. Maybe I should do that more often... guess it's time to subscribe to it's sister magazine... Cook's Country....

Thursday, October 06, 2005

Flaxseed-Peanut Butter-Low Carb

While picking up a few items in Sam's Club yesterday, I came across a new product from The Peanut Snack Co.: Naturally More; What Peanut Butter Should Be. As I picked up the jar and started reading the label, a very nice employee of Sam's asked me if I would like to try a sample. It was delicious. Great flavor and I loved the texture. I was sold!

What had initially caught my eye that it is a "natural" peanut butter. Since we've moved to Tampa I have been unable to find Crazy Richard's Peanut Butter which only ingredient is Peanuts. There are similar products out on the market, but the texture and taste just isn't the same. I do have a jar of "low-carb" peanut butter that serves in a pinch, but it isn't my favorite.

The second item that grabbed my attention is that it is fortified with Flaxseed and Flaxseed oil.

This is the first product on the market that I've seen, without going into a health food store, that contains Flaxseed! Three Cheers to The Peanut Snack Company for this wonderful and healthy product.

It came in two-pack of one pound jars each and it cost $4.64, which I thought was a great price!

Here's the breakdown and check their website out for additional information:

Serving Size: about 2 tbsp (35g/1.23oz)
Serving Per container: about 13
Calories: 169
Fat Calories: 98
Total Fat: 11 G 19%
Sat. Fat 2g 9%
Omega-3 4.1g 8%
Omega-6 1.2g 1%
Cholest. 0 mg
Sodium 130mg
Total Carbs: 8g 3%
Dietary Fiber: 4g 16%
Sugars: 2g
Protein: 10g 26%
Iron: 4%
Folic Acid: 58%
Riboflavin: 1%
Niacin: 11%
Vitamin E: 5%

Ingredients: Roasted Peanuts, Egg Whites, Wheat Germ, Flaxseed, Flax Oil, Honey, Salt

All Ingredients Proudly Grown in the U.S.A.
Website: http://www.peanutsnack.com

Wednesday, October 05, 2005

New Discovery: Ancient Flaxseed

Some interesting facts that I did not know about Flaxseed:

It's fiber is used to produce Linen.

It's oil is often called Linseed Oil.

It's origins go as far back to ancient Egypt as flax seeds and cloth have been found in tombs.

Homer mentions it in the Odyssey.

I first found found flaxseed meal in a local natural food store. I purchased it because it is low in carbs. Check out my entry on Low Carb Pizza Dough.

From UC Berkley Wellness Center / Wellness Guide to Dietary Supplements

Claims, Benefits: Prevents heart disease and cancer.

Bottom Line: Flaxseed oil is heart-healthy because it contains alpha-linolenic acid. Flaxseed itself (ground or whole) also contains lignans, which may have antioxidant actions and may help protect against certain cancers, though this is
far from certain. Skip flaxseed supplements, though.


The following comes from Shirley's Wellness Cafe:

"The human body cannot function properly without two polyunsaturated fats - linoleic and alpha-linoleic acid. These fatty acids, which are found in Flaxseed Oil are truly to normal cell structure and body function."


Flax Council of Canada -

Both brown and golden flax seeds have plenty of lignans and dietary fibre, and both contain more than 50 per cent alpha-linolenic acid. This is an omega-3 fat which offers you health and heart fitness.


Kookie Kutter

Its high content of alpha linolenic acids has made the ancient flax seed become our modern miracle food. Alpha linolenic acid is a type of omega 3 fatty acid, similar to those found in fish such as salmon. Benefits of flax seed as shown in many studies include lowering total cholesterol and LDL cholesterol (the Bad cholesterol) levels. Other benefits show that flax seed may also help lower blood triglyceride (Also Read: How to lower Triglycerides?) and blood pressure. It may also keep platelets from becoming sticky therefore reducing the chance of a heart attack.


Saturday, September 17, 2005

Pumpkin Streusel Muffins

I made these last fall and found them to be quite tasty!! I thought I'd share the recipe. Enjoy!

Pumpkin Struesel Muffins

3 1/2 cups all-purpose flour
1 cup packed brown sugar
1 Tbsp plus 1 tsp baking powder
1 1/2 tsp cinnamon
1 tsp salt
1 tsp nutmeg
1 1/4 cup canned pumpkin
2 eggs, beaten
1 cup milk
2/3 cup vegetable oil
6 ounces cream cheese, cut into 24 small chunks

Streusel Topping:
1/2 cup packed brown sugar
1 tsp cinnamon
2 tbsp butter
1/2 cup chopped walnuts

Preheat oven to 375 degrees.

In a medium sized mixing bowl, sift flour, brown sugar, baking powder, cinnamon, salt and nutmeg and set aside.

Place pumpkin in a large mixing bowl. Whisk in eggs, milk and oil. Add flour mixture and stir until moistened and combined. Line two 12 inch muffin tins with paper liners and fill half full. Place once cream cheese chunk in center of batter in each muffin cup and top with remaining batter.

Bake 20-25 minutes.

yield: 24 muffins

Saturday, August 20, 2005

The Smoke Point of Oils

I'm pretty amazed that most people who I've met and into cooking, do not understand or know about the smoking point of an oil.

The smoke point of an oil is the temperature at which oil begins to decompose and it is during that process that it begins to give off fumes or smoke. This will affect the flavor of the food. Use an instant read or candy thermometer to monitor the temperature. Successful frying relies on the right temperatures.

Oils like Canola, Peanut, Vegetable and Sunflower have fairly high smoking points and are best for deep frying. The refining process of an oil also increases it smoke point.

If you don't have a thermometer handy, CookingVillage.com offered this explanation:
Alternatively, oil can be tested by dropping a cube of white bread into the hot oil. If it browns uniformly in 60 seconds, the temperature is 350 to 365F; 40 seconds, the temperature is about 365 to 382F; 20 seconds, the temperature is about 382 to 390F.
It was found in their "Tiptionary" section

Extra virgin olive oil that is cold pressed will have a very low smoking point at approximatley 200°F. It has Great Flavor and I tend to use it more for salad dressings and mixing. Check out The World's Healthiest Foods - WHFoods.org, as this is some good information on olive oil and smoke points.

Companies are always coming with new types of oils as noted in the earlier entry I posted on Olivio Premium Spread who also produce an olive-canola oil mix. This provides you with some of the great taste and benefits of olive oil while raising the smoke point by adding canola.

Happy Frying!

Monday, August 15, 2005

Low Carb Pizza Dough - Experiment #1

What I Want: The lowest carb pizza dough possible while maintaining it's integrity.

Recipe Based On: Reverse Engineering. Tyler Florence has a great recipe that's become my staple. It has always produced very nice pizza dough, so I went with what I knew worked.

Pizza Dough - Tyler Florence
From Food Network.com
Show: Food 911
Episode: Pizza Party
Yield: 3 Pizza Crusts

1 package active dry yeast
1 teaspoon sugar
1 cup warm water
1 tablespoon kosher salt
Extra-virgin olive oil
3 cups 00 flour, plus more for dusting

In the bowl of a standing electric mixer fitted with a dough hook, combine the yeast, sugar, and warm water; stir gently to dissolve. Let the mixture stand until the yeast comes alive and starts to foam, about 5 to 10 minutes.

Turn the mixer on low and add the salt and 2 tablespoons of olive oil. Add the flour, a little at a time, mixing at the lowest speed until all the flour has been incorporated. When the dough starts to come together, increase the speed to medium; stop the machine periodically to scrape the dough off the hook. Get a feel for the dough by squeezing a small amount together: if it's crumbly, add more water; if it's sticky, add more flour - 1 tablespoon at a time. Mix until the dough gathers into a ball, this should take about 5 minutes.

Turn the dough out onto a lightly floured surface and fold it over itself a few times; kneading until it's smooth and elastic. Form the dough into a round and place in a lightly oiled bowl, turn it over to coat. Cover with plastic wrap or a damp towel and let it rise in a warm spot (i.e. over a gas pilot light) until doubled in size, about 1 hour. This is a good time to stick a pizza stone in the oven and preheat them to 500 degrees F.

Once the dough is domed and spongy, turn it out onto a lightly floured counter. Roll and stretch the dough into a cylinder and divide into 3 equal pieces. Cover and let rest for 10 minutes so it will be easier to roll out.

Roll or pat out a piece of dough into a 12 inch circle, about 1/8-inch thick. Dust a pizza paddle with flour and slide it under the pizza dough. Brush the crust with a thin layer of olive oil, and top with your favorite flavors. Slide the pizza onto the hot stone in the oven and bake for 12 to 15 minutes, until the crust is golden and crisp. Repeat with the remaining dough.


Lowered Carb Recipe - First Try:
What I Did: Substitute the 3 cups of flour with:

1 1/2 cups of White Flour
1 cup Soy Flour
1/2 cup Flaxseed Meal

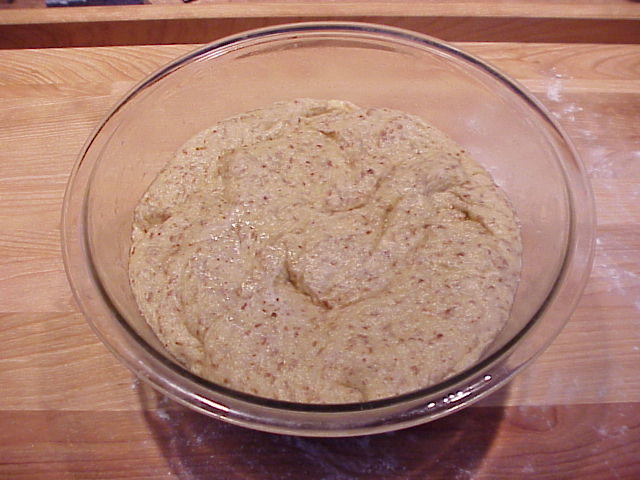
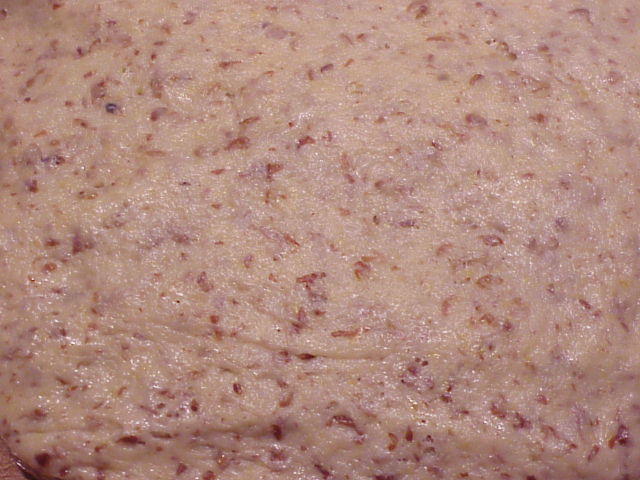
This is a close-up of the dough after rising and right before I started to roll some out. I only used about a one-third of it and put the rest in the freezer. We'll see how it holds up in a week or two.

When Mixing: It ended up taking one and 3/4 cups of flour.

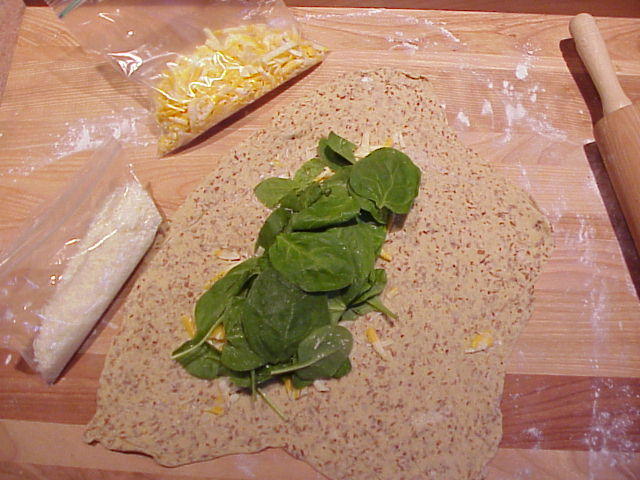
Results: The dough rose very nicely. It was easy to work with, rolled out cleanly and baked very well making some very tasty cheese and spinach calzones.

Bottom Line: An excellent pizza dough and definitley a much healthier dough than an all white flour dough but I still want to decrease the amount of white flour.